


The wilderness, with its vast landscapes and untouched beauty, can be a place of solace and adventure for many. However, it can also be unpredictable and challenging, especially for those unprepared for its rigors. Whether you’re an avid hiker, a camper, or someone who finds themselves unexpectedly stranded, understanding essential survival skills can be the difference between life and death. This article delves deep into the art and science of wilderness survival, providing readers with a comprehensive guide on how to not just survive, but thrive in the great outdoors. From the basics of finding water and food to building shelter and navigating without a compass, we’ll cover a range of skills backed by research, expert opinions, and time-tested techniques. By the end of this read, you’ll be equipped with the knowledge and confidence to face the wilderness head-on.
Survival Skills: How to Thrive in the Wilderness
Table of Contents
- Understanding the Wilderness
- Finding Water
- Securing Food
- Building Shelter
- Fire Making
- Navigation Skills
- First Aid and Health
- Frequently Asked Questions
- Final Thoughts
- Sources
Understanding the Wilderness
The wilderness is a vast expanse of nature, untouched and unaltered by human hands. It’s where the raw beauty of the earth is most evident, from the towering peaks of mountains to the dense foliage of forests. But to truly thrive in the wilderness, one must first understand it.
The Terrain
Every wilderness area has its unique terrain. From the arid deserts with their sand dunes and cacti to the dense rainforests teeming with life, understanding the lay of the land is crucial. Familiarize yourself with the topography of the area you’re venturing into. Maps, both physical and digital, can provide valuable insights into the region’s landscape, helping you identify potential water sources, shelter areas, and escape routes.
Weather Patterns
The wilderness’s unpredictability is most evident in its weather patterns. A sunny day can quickly turn into a torrential downpour, and a mild afternoon can lead to a freezing night. Before heading out, research the area’s typical weather conditions and be prepared for sudden changes. This knowledge will guide your decisions about clothing, shelter, and even when to seek higher ground.
Flora and Fauna
The wilderness is home to a myriad of plant and animal species. While some can be allies, providing food and resources, others can pose significant threats. Learn about the local flora and fauna. Understand which plants are edible, which ones are medicinal, and which ones are toxic. Recognize the signs of animal presence, be it tracks, droppings, or sounds. This knowledge not only ensures your safety but also increases your chances of finding food and water.
Potential Risks
Every wilderness adventure comes with its set of risks. From sudden weather changes and challenging terrains to encounters with wildlife, being aware of these dangers allows you to take preventive measures. Equip yourself with the right tools, such as bear sprays in bear-prone areas or snake bite kits in regions known for venomous snakes.
Respect and Leave No Trace
Understanding the wilderness also means respecting it. The principle of “Leave No Trace” is paramount. This means minimizing your impact on the environment by packing out what you pack in, not disturbing wildlife, and leaving natural features undisturbed. The wilderness has thrived for millennia without human intervention, and it’s our responsibility to ensure it remains that way for future generations.
Understanding the wilderness is a blend of knowledge, respect, and preparedness. It’s about immersing oneself in nature while being acutely aware of its challenges and beauty. Only by truly understanding the wilderness can one hope to thrive within it.
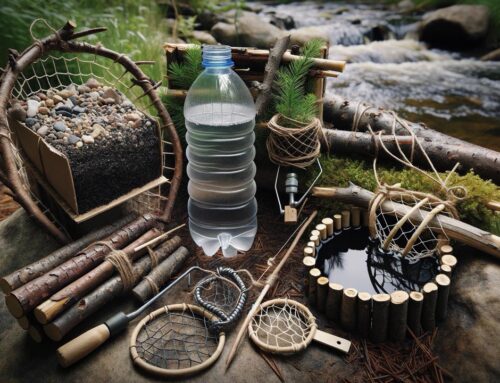
Finding Water
Water is the cornerstone of survival. The human body can only survive for about three days without it, making the quest for a clean water source paramount when in the wilderness. The wilderness, while often seen as a daunting expanse, offers various sources of water if one knows where and how to look.
Natural Water Sources
- Streams and Rivers: These are the most obvious sources of water in the wilderness. Always remember to collect water from a moving source, as stagnant water can harbor harmful pathogens. If possible, choose a spot upstream, away from any potential contaminants.
- Lakes and Ponds: While they provide a significant amount of water, they are often stagnant. It’s essential to purify this water before consumption.
- Natural Springs: Springs are a reliable source of clean water, as they come from the ground and are typically free from contaminants. They can often be found on the sides of hills or at the base of valleys.
Collecting Rainwater
Rainwater is one of the purest sources of water. Using tarps, leaves, or any other broad, flat surface, you can collect and funnel rainwater into containers. Ensure that the collection surface is clean to avoid contamination.
Dew Collection
Early in the morning, before the sun rises, plants are often covered in dew. Using a cloth or your hands, you can wipe this dew off plants and wring it into a container. It’s a labor-intensive method but can be a lifesaver in arid regions.
Plant Transpiration
Plants release water through a process called transpiration. By tying a clear plastic bag around a leafy branch and letting it sit in the sun, the water vapor released by the plant will condense on the bag’s interior. After a few hours, you’ll have a small amount of drinkable water at the bag’s bottom.
Digging for Water
In certain terrains, especially near dried riverbeds or valleys, water can be found just a few feet below the surface. Dig a hole until you hit moist soil, and after a while, water will start to fill the pit. This water will need purification before drinking.
Purifying Water
Regardless of the source, it’s always a good practice to purify water before consumption. Here are some methods:
- Boiling: Bring water to a rolling boil for at least one minute. At higher altitudes, increase the boiling time.
- Water Purification Tablets: These are lightweight and easy to carry. Follow the instructions on the package.
- Water Filters: Portable water filters can remove most pathogens and contaminants, making the water safe to drink.
- Solar Disinfection: Fill a clear plastic bottle with water and leave it in direct sunlight for at least six hours. The UV rays will kill most pathogens.
While the wilderness might seem like a challenging place to find water, nature provides in abundance if one knows where to look. Always prioritize finding water in a survival situation and ensure its safety before consumption.
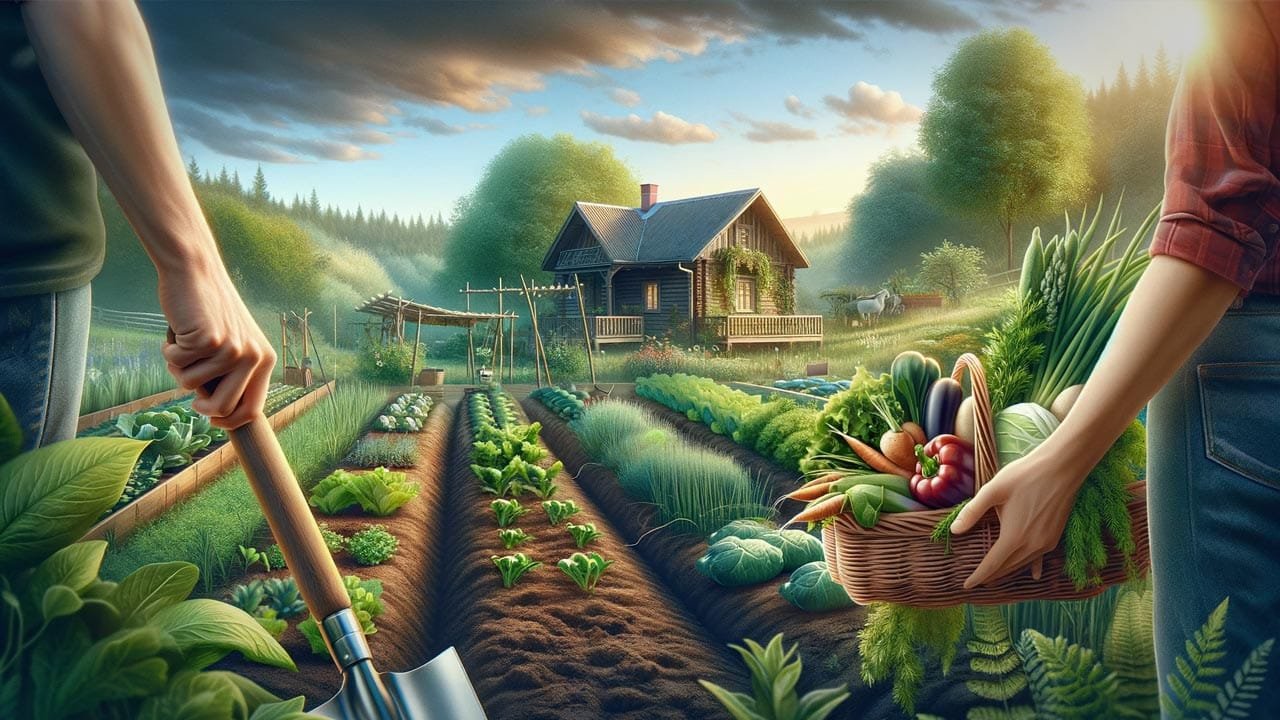
Securing Food

In the wilderness, securing food is a challenge that requires knowledge, skill, and sometimes a bit of luck. While the human body can survive without food for an extended period, nourishment is essential for maintaining energy, morale, and cognitive function. Here’s a comprehensive guide to finding and securing food in the wild.
Understanding the Basics
Before diving into specific methods, it’s crucial to understand some basics:
- Safety First: Not all that’s edible looks appetizing, and not all that looks appetizing is edible. Many plants and animals can be toxic or carry diseases.
- Conserve Energy: Hunting and gathering can be energy-intensive. Always weigh the energy spent against the potential energy gained from food.
- Diversify Your Diet: Relying on a single food source can lead to nutritional deficiencies. Aim for a mix of proteins, fats, and carbohydrates.
Plants and Fruits
- Edible Plants: Familiarize yourself with local flora. Some plants like dandelions, clover, and cattails are commonly found and are edible. However, always be cautious and avoid plants with milky sap, three-leaved growth patterns, or an almond-like smell, as these can be signs of toxicity.
- Berries: While many berries are edible and nutritious, others can be poisonous. Stick to berries you can identify, like blackberries, blueberries, or raspberries. Avoid white or yellow berries, as many are toxic.
- Nuts and Seeds: Many trees, like oak (acorns) and pine (pine nuts), offer edible nuts and seeds. Ensure they are properly prepared, as some require cooking or leaching to remove toxins.
Hunting and Trapping
- Snares and Traps: Setting up snares using wires or strong cordage can help catch small game like rabbits or squirrels. Familiarize yourself with basic snare setups and place them along animal trails.
- Fishing: If near a water source, fishing can provide a valuable protein source. Improvise fishing lines using cordage and makeshift hooks from bones or thorns.
- Insects: Often overlooked, insects like crickets, grasshoppers, and certain larvae are rich in protein and widely available. Ensure they are cooked to kill any potential pathogens.
Tools and Weapons
- Improvised Spears: Sharpened sticks can be used as spears for fishing or defending against predators.
- Slingshots: With a Y-shaped branch and some rubber (from shoes or other sources), you can create a slingshot to hunt small game.
- Stone Tools: Flint or other sharp-edged stones can be used to butcher game or prepare plants.
Preservation
Once you’ve secured food, it’s essential to preserve any excess to prevent spoilage:
- Smoking: By hanging meat over a smoky fire, you can dry and preserve it for several days.
- Sun Drying: In arid regions, laying slices of meat or fruit in direct sunlight can effectively dry and preserve them.
- Burying: In colder climates, digging a pit and storing food below the frost line can keep it fresh for longer.
Securing food in the wilderness requires a combination of knowledge, skill, and adaptability. While nature provides, it’s up to the individual to harness these resources effectively and safely. Always prioritize safety, and when in doubt, avoid consuming unknown plants or animals.
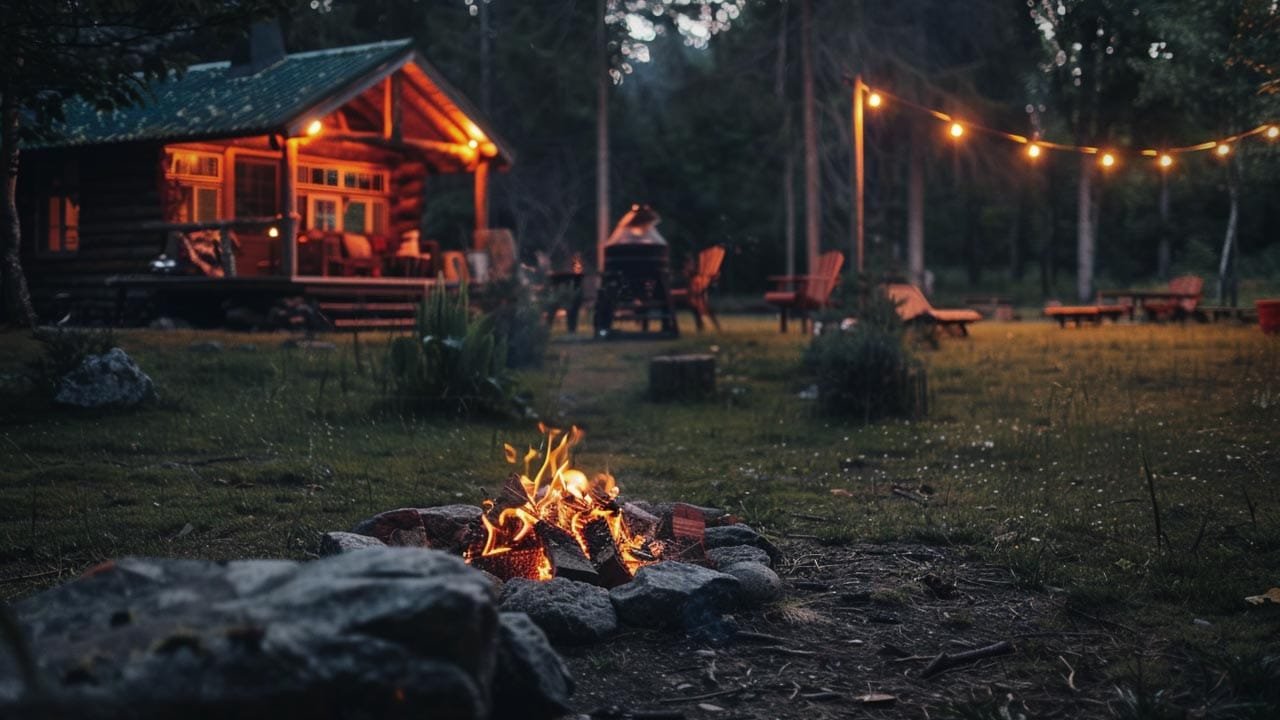
Building Shelter
In the wilderness, shelter is more than just a place to sleep. It’s a refuge from the elements, a barrier against wildlife, and a psychological comfort that can boost morale in challenging situations. A well-constructed shelter can protect you from extreme temperatures, rain, snow, and wind. Here’s a detailed guide on building a shelter in the wild.
Importance of Shelter
Before diving into the specifics, it’s essential to understand why shelter is crucial:
- Protection from Elements: Exposure to extreme cold or heat can lead to hypothermia or heatstroke, both of which can be fatal.
- Safety from Wildlife: A shelter can act as a deterrent against curious or predatory animals.
- Rest and Recovery: A good night’s sleep is vital for maintaining energy and making sound decisions, especially in survival situations.
Choosing a Location
The location of your shelter is as important as the shelter itself:
- Away from Hazards: Avoid places prone to flooding, avalanches, or falling rocks. Stay away from low-lying areas where cold air or water might collect.
- Proximity to Resources: Ideally, choose a location near a water source but not so close that it attracts wildlife or poses a flooding risk. Being near resources like firewood or food can also be beneficial.
- Visibility: If you’re trying to be rescued, being in a visible location can be advantageous. However, if you’re avoiding detection, opt for a more concealed spot.
Types of Shelters
- Lean-To: This is one of the simplest shelters. Find a fallen tree or a large branch leaning against another tree. Layer branches, leaves, or grass on one side, creating an angled wall. This will shield you from the wind and rain.
- Debris Hut: Start with a strong ridgepole leaning against a tree or rock. Cover it with branches, then pile leaves, moss, or grass on top for insulation. The entrance should be just big enough for you to crawl into.
- Snow Cave: In snowy terrains, dig into a snowbank or drift. The snow acts as an insulator, trapping body heat inside. Ensure you poke small air holes for ventilation.
- Trench Shelter: Dig a trench in the ground and place a tarp or branches over the top. This type of shelter is low-profile and offers protection from the wind.
- Natural Shelters: Caves, large fallen trees, or rock overhangs can provide immediate shelter. However, ensure they’re safe and free from other inhabitants like bears or snakes.
Insulation and Bedding
The ground can sap your body heat. Always create a layer of insulation between you and the ground using leaves, grass, or boughs. This bedding will keep you warmer and more comfortable.
Weather Considerations
- Cold Weather: Focus on insulation. The smaller the interior of the shelter, the easier it will be to keep warm with body heat.
- Rainy Weather: Ensure your shelter is waterproof. A sloping roof will allow rainwater to run off, and a raised floor will keep you dry.
- Hot Weather: Opt for open shelters that allow airflow. Shade is crucial, so build your shelter in a shaded area or use a tarp or cloth to create shade.
Final Tips
- Always check for hazards like hornet nests or loose rocks before starting construction.
- Use natural features to your advantage. A boulder or fallen tree can serve as a windbreak or the backbone of your shelter.
- Regularly maintain and check your shelter for any damage or weak points.
Building a shelter is both an art and a science. It requires creativity, adaptability, and a keen understanding of the environment. In survival situations, a well-constructed shelter can make the difference between life and death, so it’s a skill worth mastering.
Fire Making

Fire is one of humanity’s oldest and most essential survival tools. In the wilderness, it serves multiple purposes: providing warmth, purifying water, cooking food, signaling for help, and offering psychological comfort. Mastering the art of fire-making can be the difference between a comfortable night under the stars and a cold, dangerous ordeal. Here’s a comprehensive guide on creating and maintaining a fire in the wild.
The Science of Fire
Understanding the basic science behind fire can aid in its creation:
- Fuel: This is the material that will burn, such as wood or leaves.
- Oxygen: Fire requires oxygen to burn. Ensure your fire setup allows for adequate airflow.
- Heat: A heat source, like a spark or ember, is needed to ignite the fuel.
Preparing the Fire Site
- Choose a Safe Location: Opt for a spot away from trees, bushes, and other flammable materials. If it’s windy, find a location shielded from the wind or create a windbreak using rocks or logs.
- Clear the Ground: Remove any leaves, twigs, or grass from the area to prevent accidental spreading of the fire. Ideally, you should have bare earth or rock around your fire site.
- Fire Pit: Dig a shallow pit. This will protect the fire from wind and contain it.
Gathering Materials
- Tinder: This is the material that will catch a spark and ignite first. Examples include dry leaves, grass, pine needles, and tree bark.
- Kindling: Small twigs and branches that will catch fire from the tinder and help it grow.
- Fuel: Larger logs and branches that will sustain the fire once it’s established.
Methods of Ignition
- Flint and Steel: Striking flint against steel produces sparks. Direct these sparks onto your tinder.
- Bow Drill: This primitive method involves spinning a stick (spindle) on a wooden base (fireboard) using a bow. The friction generates heat, producing an ember.
- Firestarter: Commercially available firestarters, like magnesium blocks or fire sticks, can be invaluable in damp conditions.
- Matches and Lighters: Always a good idea to have in a survival kit. Waterproof matches or stormproof lighters can work even in wet conditions.
Building the Fire
- Teepee Fire: Start with a cone of tinder, then build a teepee of kindling around it. As the fire grows, add larger logs in the same shape.
- Log Cabin Fire: Lay two larger logs parallel to each other. Place two smaller logs on top, perpendicular to the first two, creating a square. Continue stacking, decreasing the log size. Place tinder and kindling in the center.
- Lean-To Fire: Drive a long stick into the ground at an angle. Lean smaller sticks against it and place tinder underneath.
Maintaining and Extinguishing
- Feeding the Fire: Add logs and branches as needed. Remember, oxygen is crucial, so don’t smother the fire.
- Safety: Always keep water or sand nearby to extinguish the fire in case it gets out of control.
- Extinguishing: Douse the fire with water, ensuring all embers are wet. Stir the ashes to make sure no hot spots remain. Feel with your hand to ensure everything is cold.
Final Thoughts
Fire-making is a skill that requires practice. It’s always a good idea to familiarize yourself with these techniques before venturing into the wilderness. Respect fire and its potential dangers. Always ensure your fire is completely extinguished before leaving the site. Remember, with the warmth and comfort fire provides, comes the responsibility of using it wisely and safely.
Navigation Skills
Navigating through the wilderness can be both an exhilarating experience and a daunting challenge. Whether you’re on a planned adventure or find yourself lost, possessing essential navigation skills can be the difference between a memorable journey and a perilous ordeal. This guide delves into the art and science of wilderness navigation, ensuring you can find your way in almost any outdoor situation.
The Basics of Navigation
- Stay Calm: If you realize you’re lost, the first step is to stay calm. Panic can cloud judgment and lead to poor decisions.
- Orient Yourself: Before moving, try to recall your last known location and any significant landmarks.
- Avoid Wandering: If you’re truly lost and rescue is likely, it’s often best to stay put, especially if you’re in a location where you can be easily spotted.
Traditional Navigation Tools
- Map: A topographical map provides a detailed representation of the terrain, including elevations, water sources, and landmarks.
- Reading Contour Lines: These lines represent elevation. Closer lines indicate steeper terrain, while spaced-out lines suggest flatter areas.
- Compass: This tool points to magnetic north, helping you determine direction.
- Taking a Bearing: Align the compass with your map to determine the direction from your current location to your destination.
- Altimeter: Measures altitude, which can be useful in mountainous regions when paired with a topographical map.
Natural Navigation Techniques
- Sun Navigation: The sun rises in the east and sets in the west. By observing its position, you can get a general sense of direction.
- Stick Method: Place a stick vertically in the ground. The shadow it casts points roughly towards the west. Mark the tip of the shadow and wait 15 minutes. The shadow will move, and its new position, when connected with the first, creates an approximate east-west line.
- Star Navigation:
- Northern Hemisphere: Locate the North Star (Polaris). It’s aligned with Earth’s axis and indicates true north.
- Southern Hemisphere: The Southern Cross constellation can help determine the south direction.
- Landmarks: Mountains, rivers, and other prominent features can serve as reference points.
- Water Flow: In many regions, rivers and streams flow towards larger bodies of water or populated areas.
Modern Tools
- GPS Devices: These devices use satellites to determine your exact location. Many also allow you to set waypoints, track your path, and more.
- Smartphone Apps: Various apps can turn your smartphone into a navigation tool. However, relying solely on them can be risky, especially in areas with no signal.
Tips and Tricks
- Always Inform Someone: Before heading into the wilderness, inform someone of your intended route and expected return time.
- Practice: Familiarize yourself with navigation tools and techniques before you need them. Practice using a map and compass in known areas.
- Backup: Always have a backup navigation method. If you rely on a GPS, carry a map and compass as a backup.
Navigation is a blend of art, science, and intuition. While tools and techniques are invaluable, the most crucial aspect is awareness—constantly observing and interpreting the environment around you. With practice and experience, you’ll develop a keen sense of direction, ensuring you can confidently navigate any wilderness terrain.
First Aid and Health

In the wilderness, where help can be hours or even days away, possessing basic first aid knowledge is paramount. Accidents, injuries, and health issues can arise unexpectedly, and the ability to address them promptly can mean the difference between a minor inconvenience and a life-threatening situation. This guide provides an overview of essential first aid and health considerations when navigating the great outdoors.
The Importance of Preparation
- First Aid Kit: Always carry a well-stocked first aid kit tailored to your activity and the number of people in your group. Regularly check and replenish its contents.
- Training: Consider taking a wilderness first aid course. These courses provide hands-on training for common outdoor injuries and emergencies.
- Medications: If you or anyone in your group takes regular medications, ensure you have an adequate supply, plus some extra in case of delays.
Common Wilderness Injuries and Treatments
- Cuts and Scrapes:
- Treatment: Clean the wound with clean water or antiseptic wipes. Apply antibiotic ointment and cover with a bandage or gauze.
- Sprains and Strains:
- Treatment: Remember the R.I.C.E method – Rest, Ice (or cold packs), Compression, and Elevation. Immobilize the injured area if possible.
- Burns:
- Treatment: Cool the burn with cold water for at least 10 minutes. Cover with a non-stick dressing. Avoid popping any blisters.
- Bites and Stings:
- Treatment: For insect stings, remove the stinger using the edge of a credit card. Apply a cold pack to reduce swelling. For snakebites, keep the victim calm and immobilize the bitten limb. Seek emergency help immediately.
- Hypothermia:
- Symptoms: Shivering, confusion, numbness, fatigue.
- Treatment: Move the person to a sheltered area, remove wet clothing, and warm them using dry clothing, blankets, or body heat.
- Heat-Related Illnesses (Heat Exhaustion and Heat Stroke):
- Symptoms: Heavy sweating, weakness, dizziness, nausea, headache.
- Treatment: Move to a cooler place, hydrate, and rest. For heat stroke, which is a medical emergency, cool the person down as quickly as possible and seek medical attention.
Water and Food Safety
- Water Purification: Always purify water from unknown sources. Methods include boiling, chemical purification tablets, and portable water filters.
- Safe Food Handling: Store food in airtight containers. Hang food away from your campsite to deter wildlife. Cook food thoroughly and avoid consuming anything you’re unsure about.
Mental Health
- Stay Calm: In stressful situations, panic can exacerbate problems. Take deep breaths, assess the situation, and make informed decisions.
- Stay Positive: A positive mindset can boost morale and improve decision-makig. Focus on tasks, set small goals, and celebrate small victories.
Evacuation and Signaling for Help
- When to Evacuate: If someone’s condition worsens despite first aid or if you encounter a severe injury like a broken bone, it’s time to consider evacuation.
- Signaling for Help: Use mirrors, flashlights, or whistles to signal for help. Three of anything (three whistle blows, three fires, three flashes) is a universal distress signal.
While the wilderness offers unparalleled beauty and adventure, it also comes with inherent risks. Being prepared, understanding basic first aid, and knowing how to maintain health in the outdoors are essential skills for every adventurer. Remember, the best way to handle emergencies is to prevent them in the first place through preparation, awareness, and education.
Frequently Asked Questions
Final Thoughts
The wilderness, while breathtaking, is unforgiving. The most crucial takeaway from this article is the importance of preparation and knowledge. Equip yourself with the right skills, always be cautious, and respect nature. With the right mindset and tools, you can not only survive but thrive in the wilderness.
Sources
- National Outdoor Leadership School (NOLS)
- Wilderness Survival Guide
- Smith, John. Surviving the Wild: A Comprehensive Guide. Nature Press, 2020.
- Johnson, Emily. “Edible Plants in North America.” Outdoor Life Magazine, 2018.


Leave A Comment